Sunday, June 23, 2013

Milani Easy Brow pencil.... I think Im in love

So I picked up milani's easy brow automatic pencil yesterday.  I wanted to try something other than my usual NYC pencil. And let me tell you, I couldn't be more satisfied with my purchase! 


I love the fact that it has a small tip, which makes it easier to trace the brow. I also love the fact that it comes with a spoolie on the opposite end. The texture of the pencil is thick, not creamy, which is perfect because creamy textured pencils make the eyebrow look shiny. (EWWWWW) I found this at walmart for only $5. Totally worth it. I think this maybe a good dupe for MAC's spiked brow pencil. 


My brow after using the Milani pencil. I think I'm in love! :) Try it! 

XOXO
Charmaine 

Wednesday, June 19, 2013

Neutral eyes PLUS Annoucement!

I just love a neutral eye! I only wear colors on occasion.  The reason I love a neutral eye is because it's so versatile. You can wear any color outfit you want, with out the color of your eye make up clashing with your clothing. And most importantly, nothing makes a bold lip pop more than having a neutral eye. Neutral eyes, you can't go wrong.  They are the perfect go to look. 


DRUM ROLL............
Be on the look out I will be creating a YouTube channel for beauty Maine! More in depth tutorials and tips! I begin recording soon!!!!!

XOXO
Charmaine 

Saturday, June 15, 2013

Turn your day look to a night look

Already have your day time makeup on and need to change it up for a girls night out or even a date! Read on to see how I created this quick, fun, colorful look :) 


Here's the simple day look I started out with..... Time to transform....


Using a large crease brush add a medium pink color to your eye crease, make sure to use windshield wiper motion when applying the color to diffuse and blend the color out...


Next apply a base to the eye lid. This gives the color something to adhere to and make the eyeshadow pop. I used NYX jumbo pencil in the color milk.


Add a green shadow on top of the base. Then use the crease brush again in between the eyelid and crease to blend the pink and green together.


Next,using a medium size crease brush, add a dark purple to the outer B of your eye, don't move the purple to the brow bone, like you did the pink. Once again blend! ;)


Next, apply generous coats of mascara or better yet apply a pair of false lashes!! ;) Then, add black eyeliner above your lashes and to your waterline.


Next, using an eyeliner brush apply the green shadow underneath your bottom lashes and add mascara to your bottom lashes.

Finally add, a light pink eyeshadow to your inner eyelid/tear duct. Use your finger to slightly blend it in. This gets rid of any harsh lines. 
Touch up your foundation and lipstick and you are out the door.


XOXO
Charmaine 

Wednesday, June 12, 2013

15 minute Face- Tutorial

Ok, so we've all had those moments where we don't have enough time to do our makeup. Whether it be your friend invites you somewhere last minute or you are pressed for time getting ready for work. Here's a tutorial to show you a quick makeup look, that looks like you actually took the time to do your makeup.


So, if you want to see how I transformed myself in less than 15 minutes, keep reading! 


These are the products I used: Mac studio fix powder and prolong wear concealer, wet n wild walking on egg shells eyeshadow palette, NYC rose blush, rimmel nude eyeliner, and maybelline falsies and NYC Skyrise mascaras.

Start of with a clean and moisturized face.


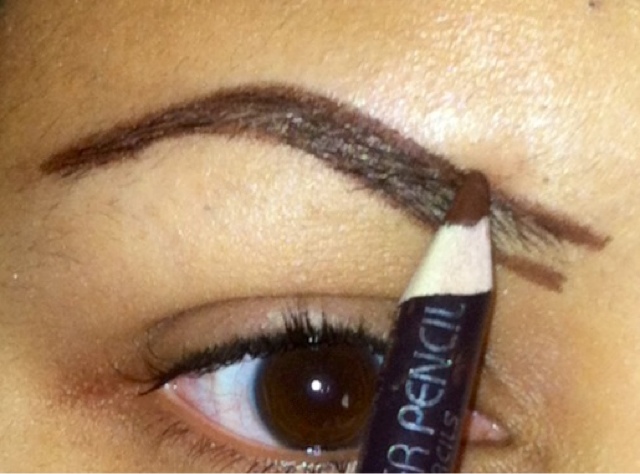
Fill in your eyebrows ;) 


Using a large crease brush. Apply a light brown shadow slightly darker that your complexion and apply it ONLY in your eye crease. Using windshield wiper motions. Back and forth, back and forth.  Build the color to your liking. I used a Bobbi brown crease brush and the brown eyeshadow from the wet n wild eyeshadow palette. 


Next apply Mac prolong wear concealer (or apply a full coverage concealer a shade lighter than your conplexion of your choice) underneath your eyes. Blend it well.


Next, apply the prolong wear concealer on any blemish on your face that you would want to cover up. I have a few pimple scars in my cheek and chin and like to conceal my upper lip. If you are fortunate enough to have no blemishes you can skip this step. Blend the concealer in.


Yes have a good laugh at my mascara face! Lol . Apply generous coats of mascara. I used maybelline falsies in very black.   Hopefully you look cute putting your mascara on while you are laughing at me :p lol lol 


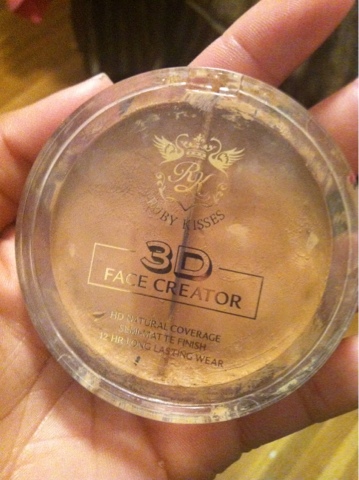
Using Elfs powder brush and Macs studio fix powder buff the powder all over your face. I buffed it in, because the powder is acting as a foundation. Because this is a foundationless look. :) 


Ooooo the concentration. lol :) Using rimmels nude eyeliner, apply it to your waterline. This brightens the eye. I just freakin love this liner! ;) 


Ha! No more funny mascara faces thins time. Lol I'm still looking crazy lol. Anyway apply mascara to your bottom lashes. I'm using NYCs Skyrise mascara. I love this mascara for bottom lashes. The mascara wand is small and skinny, perfect for the bottom lashes.


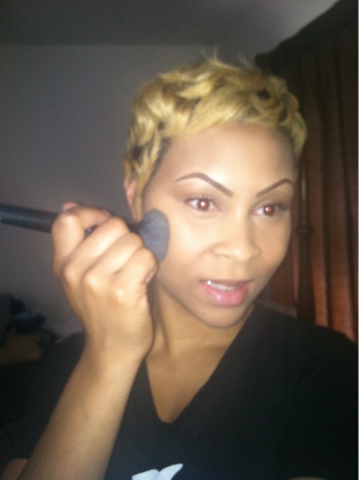
Apply a natural colored blush to your cheeks, to bring a little color to your face. 


Apply your choice of color lipstick/gloss. I choose loreals fairest nude lipstick. It keeps the look more daytime/work appropriate. And BAM! diva you are done!!!


XOXO
Charmaine 

NUDE Rimmel Scandal Eyes Eyeliner - I'm in love <3

OMG!  Rimmel is really stepping their makeup game up! I am absolutely in obsessed with their scandal eyes eyeliner in nude. I wear it almost everyday! It goes on smooth and lasts for hours... 

I apply it to my waterline in my eye. It makes the eyes appear more "awake." 

The only thing I don't like about it is, what you see is what you get. You can't sharpen the pencil, so once the product is gone its over, time for a new one. Lol Thankfully it's affordable, it's only $4 at Walmart and Target! 

It's a good alternative to MACs chromagraphic pencil. 


I suggest you pick one up ASAP, it's totally worth it! 

XOXO
Charmaine 

Tuesday, June 11, 2013

Get those Brows right!- Eyebrow tutorial

I constantly get asked how I do my eyebrows, well its time to spill the beans. This is the "sculpted" way I fill in my brows, I have a more "natural" way I fill them in as well. (But thats another blog, for another time.) :)

 
So, if you want to see how I got from a sparse, dull eyebrow to this full, sculpted eyebrow keep reading!!

You will need these 5 products... A CREAM based concealer ( not liquid), a double ended spoolie with a angled brush attached ( a spoolie is nothing but a mascara wand), a flat liner brush, brow powder, clear mascara gel, and a brown eye brow pencil.


Side Note: Heres a cheaper alternative to the Mac concealer. Its by Ruby Kisses, I purchased it at a beauty supply store for about $5. It works just as well. Ok, back to the tutorial lol.....


Starting with a well groomed/tweezed eyebrow, use a SHARPENED eyebrow pencil, outline the natural shape of your brow. Do not press down too hard, just use light strokes

 Side Note: a sharpened pencil gives the best results, so it is necessary to resharpen the pencil before working on the other eye....

Keep in mind that you do not have to be completely perfect when outlining the brow, that is what the concealer will be used for later, to clean up the mistakes/imperfections.


Next, LIGHTLY, fill in the brow with the brow pencil.Once again, dont be overly particular about the neatness of how you fill it in, we will correct that in the next step. Oh and please excuse my brows they are in need of a tweezer lol.


Dip the angled brush end of the spoolie in the brow powder and lightly apply the brow powder on top of the eyebrow. The brow powder sets the eyebrow pencil, helping your eyebrows to be smudge proof and last all day.


Using the spoolie, starting at the front of your eyebrows, brush out your eyebrows. This helps blend the powder and pencil into your eyebrow giving it a more natural look and less like you drew your eyebrows in. Make sure you blend the beginning of your eyebrow out to get rid of the square/box shape. Box shape brows are a definite NO NO!


This is how your brow should look after you brushed it out with the spoolie. Notice how the beginning of my brow does not have the box shape as it did in the beginning of the tutorial.


Using the flat liner brush, outline your brows with the concealer. This cleans up any mistakes and keeps the brows a clean/sculpted/well groomed look.
Side Note: choose a concealer a shade lighter than your skin tone. It acts a natural brow hightlight for your eyeshadow look.


Blend the concealer out with your flat line brush and finger. This gets rid of harsh lines.


Finally, apply clear mascara gel across the brows. This keeps the hairs in place and sets the eyebrows so they last all day long.


Here is the Finished brow!


Now, this process takes a little while to master. The more you fill in your eyebrows this way, the better you will get.


XOXO
Charmaine